


Discover the ins and outs of installing a Virtual Private Network (VPN) on your school computer. This guide will help you understand the benefits, navigate common restrictions, and get your VPN up and running.
- VPNs and School Computers
- What is a VPN?
- Benefits of Using a VPN on Your School Computer
- Common Restrictions on School Computers
- Choosing the Right VPN for School
- Installing a VPN on Your School Computer
- Step-by-Step Guide for Installation
- Troubleshooting Common Installation Issues
- Using a Chromebook for VPN Installation
- Bypassing Restrictions with a VPN
- How a VPN Can Help Bypass School Restrictions
- Maintaining Privacy While Using a VPN at School
- Legal and Ethical Considerations
- Using a VPN on School Networks
VPNs and School Computers
What is a VPN?
A Virtual Private Network, commonly referred to as a VPN, is a sophisticated cybersecurity tool designed to provide a secure and private internet connection. When you use a VPN, your internet traffic is routed through an encrypted tunnel to a VPN server operated by your chosen VPN provider. This encryption ensures that your online activities remain secure and private, shielding your data from prying eyes, including your Internet Service Provider (ISP) or school network administrators. Essentially, a VPN works by masking your actual IP address with that of the VPN server, making it appear as though you are browsing from a different location. This fundamental mechanism is what allows users to bypass geo-restrictions and enhance their online anonymity.
Benefits of Using a VPN on Your School Computer
Installing a VPN on your school computer can offer a multitude of benefits, particularly when navigating the often-restrictive school networks. One of the primary advantages is the ability to bypass network restrictions that commonly block access to social media sites, streaming services, and other popular websites. By using a VPN, you can access blocked content and enjoy a more open internet experience on your school device, whether it’s a Chromebook or a laptop. Furthermore, a VPN provides an additional layer of cybersecurity, encrypting your data and protecting your personal information when you connect to public Wi-Fi networks often found in schools. This ensures that your online activities remain secure and private, preventing unauthorized monitoring.
Common Restrictions on School Computers
School computers and networks are typically configured with stringent restrictions designed to maintain focus on educational activities and prevent access to inappropriate content. These school restrictions often include content filters that block access to a wide range of websites, such as social media sites like Facebook and Instagram, gaming platforms, and even certain news sites. Additionally, network restrictions might limit bandwidth for specific applications or entirely block certain ports, making it difficult to download or install unapproved software. These measures are put in place by school IT departments to manage network traffic, conserve bandwidth, and ensure a safe and conducive learning environment. Understanding these common restrictions is crucial when considering how to install a VPN on your school computer to effectively bypass them.
Choosing the Right VPN for School

Features to Look for in a VPN
When selecting the right VPN for use on a school computer, several key features should be prioritized to ensure effective and secure browsing. First, look for a VPN service that offers robust encryption, preferably AES-256, to safeguard your data from school networks and any potential eavesdroppers. A kill switch is another essential feature, as it automatically disconnects your internet if the VPN connection drops, preventing your real IP address from being exposed. Consider a VPN provider with a large network of servers spread across various locations, which will give you more options to bypass geo-restrictions and access blocked content. Furthermore, ensure the VPN has a strict no-logs policy, meaning it does not record your online activities, thus preserving your privacy. Finally, assess the VPN’s speed and reliability, as a slow or frequently disconnecting VPN can hinder your online experience on your school computer.
Top VPN to Use on School Computers
Top-tier VPNs are highly recommended for use on school computers due to their strong security features, speed, and ability to bypass network restrictions. VPNIFY is a popular choice, known for its extensive server network, advanced encryption, and user-friendly interface, making it easy to download and install. This VPN offers dedicated VPN app and reliable performance, making it ideal for students looking to bypass school restrictions and access blocked websites.
Installing a VPN on Your School Computer
Step-by-Step Guide for Installation
To successfully install a VPN on your school computer, the first step is to choose a reliable VPN provider, and then create an account on their website. Once you have an account, you will typically download the VPN client or VPN app directly from the provider’s official website. For most school devices, including laptops, the installation process is straightforward: locate the downloaded installer file, often an .exe for Windows or .dmg for macOS, and run it. Follow the on-screen prompts, accepting the terms and conditions, and choosing the installation location. After the installation is complete, open the VPN app, log in with your credentials, and you can then connect to a server of your choice. This process will encrypt your internet traffic and help you bypass school restrictions, allowing you to access blocked websites and enjoy a more secure and private browsing experience.
Troubleshooting Common Installation Issues
When trying to install a VPN on a school computer, you might encounter several common issues that can hinder the process. One frequent problem is administrative restrictions on the school computer itself, which prevent you from installing new software. In such cases, you might need to try alternate methods like using a portable VPN client if the VPN provider offers one, or resorting to browser extensions, though these offer less comprehensive protection than a full VPN app. Another issue could be network restrictions implemented by school networks that block access to VPN websites or prevent the VPN connection from being established. If your VPN connection drops frequently, it could be due to network interference or an unstable internet connection; ensure your VPN settings are configured correctly and try connecting to a different VPN server. Sometimes, antivirus software or firewalls can interfere with the installation or operation of the VPN; temporarily disabling them might resolve the issue, but remember to re-enable them afterwards for your cybersecurity.
Using a Chromebook for VPN Installation
Installing a VPN on a Chromebook for school use presents a slightly different, yet often simpler, process compared to traditional laptops. Chromebooks primarily use Android apps, so the most straightforward method is to download and install the VPN app directly from the Google Play Store. Most reputable VPN providers offer dedicated VPN apps optimized for Android and Chrome OS. Simply open the Google Play Store on your Chromebook, search for your chosen VPN provider, and click “Install.” Once the app is installed, open it, log in with your account credentials, and connect to a server. This will effectively create a VPN on your school computer, allowing you to bypass school restrictions and access blocked content. Some Chromebooks also support Linux apps, which could offer an alternative if the Android app is not suitable, but using the Play Store is generally the easiest and most recommended method to get a VPN on your school Chromebook.
Bypassing Restrictions with a VPN
How a VPN Can Help Bypass School Restrictions
A Virtual Private Network, or VPN, can be an indispensable tool for students looking to bypass school restrictions and access blocked content on their school computer. When you use a VPN, your internet traffic is routed through an encrypted tunnel to a remote VPN server, effectively masking your real IP address and making it appear as though you are browsing from a different location. This process allows you to circumvent content filters and network restrictions often imposed by school networks, giving you the ability to access blocked websites, streaming services, and social media sites that would otherwise be inaccessible. Whether you’re trying to use a VPN to get a VPN connection to educational resources or simply access recreational content, a reliable VPN service can help you achieve a more open internet experience on your school computer.
Maintaining Privacy While Using a VPN at School
While using a VPN on a school computer can effectively bypass school restrictions, maintaining privacy is paramount to ensure your online activities remain secure and private. A reputable VPN service will encrypt your internet traffic, preventing school IT administrators from monitoring your online movements. To further enhance your privacy, choose a VPN provider that adheres to a strict no-logs policy, meaning they do not record your browsing history or personal data. Additionally, ensure the VPN app or VPN client you install has a kill switch feature, which automatically disconnects your internet if the VPN connection drops, preventing your real IP address from being exposed. By prioritizing these cybersecurity features, you can confidently use a VPN on your school computer without compromising your privacy, even when connecting to public Wi-Fi networks.
Legal and Ethical Considerations
Before you install a VPN on a school computer, it is crucial to understand the legal and ethical considerations involved, as the rules regarding VPNs being allowed on school networks can vary. While using a VPN for personal privacy and cybersecurity is generally legal in most places, schools often have strict acceptable use policies that prohibit bypassing their network restrictions. Violating these policies could lead to disciplinary actions, including loss of internet privileges or other school-imposed consequences. It’s important to acknowledge that school networks are designed to maintain a focused learning environment and protect students. Therefore, before you configure a VPN or try to install the VPN app, it is advisable to review your school’s IT policy or even consult with IT staff if possible, to ensure your actions align with their guidelines and to avoid potential issues.
Using a VPN on School Networks
Connecting to Wi-Fi with a VPN
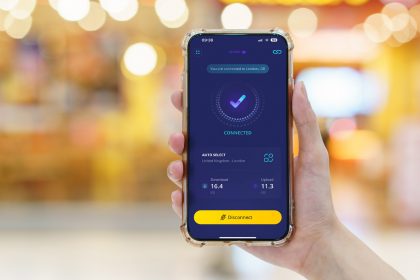
Connecting to Wi-Fi with a VPN on a school computer is a straightforward process once you have successfully installed the VPN client or VPN app. After you download and install the VPN from a reliable VPN provider, open the VPN app and log in with your credentials. You will then be presented with a list of available VPN servers. Choose a server located in a region that allows access to the content you wish to view, and then click the “Connect” button. Your internet traffic will now be routed through the chosen VPN server, encrypting your data and securing your connection, especially when using public Wi-Fi. This secure and private connection will enable you to bypass network restrictions and access blocked websites on your school computer, be it a laptop or a Chromebook.
Performance Tips for Using a VPN on School Computers
To optimize the performance of your VPN on a school computer, there are several tips you can follow to ensure a smooth and effective experience. First, always connect to a VPN server that is geographically closer to your actual location, as this can significantly reduce latency and improve connection speeds. If your VPN connection drops frequently, try switching to a different server within the VPN app, as some servers may be overloaded or experiencing issues. Ensure that your VPN settings are configured for optimal performance, often by choosing a faster protocol if available. Additionally, close any unnecessary applications running in the background on your school computer, as they can consume bandwidth and slow down your internet connection.
Alternatives to VPNs for Accessing Blocked Content
While installing a VPN on a school computer is an effective way to bypass school restrictions and access blocked content, there are a few alternatives you might consider if you cannot install a VPN or if VPNs are allowed is a concern. One common alternative is using a proxy server or a web proxy, which routes your internet traffic through a different server, similar to a VPN, but without the encryption benefits. Many online proxy websites are available, though they typically offer less security and reliability compared to a full VPN service. Another option could be using a browser extension that offers similar unblocking capabilities, although these extensions only work within the browser and do not protect all internet traffic on your school computer. For Chromebook users, exploring the built-in VPN functionality if available, or looking for specific Chrome browser tools, might offer limited success without full system-wide protection.